Showing posts with label terrain. Show all posts

Tuesday, 6 October 2020

Old Dog Learns New (Terrain) Tricks - Part the Last (At Last)

My modest terrain project has been languishing in obscurity for the last three months while real life does its damndest to upset my personal applecart, but I'm going to draw a line under the blasted thing and blog it.

OK, the last we saw of the piece, it was awaiting paint and groundwork. The plaster rocks had been hot glued into place, the gaps filled with Sculptamold, and the MDF base smoothed over with more of that excellent product.


Painting was next, using the "leopard-spotting" technique I picked up from Mel the Terrain Tutor and Luke at Geek Gaming Scenics (both channels are an absolute must for aspiring scenery builders). No, it doesn't mean taking a pair of binoculars out on the savannah. It's a technique for painting rocky surfaces more realistically than the old "three shades of grey plus a drybrush" that many of us cut our terrain painting teeth on.

I splashed a thin wash of yellow ochre acrylic (the cheap stuff from the $2 shop) over about a third of the rock faces and ruins, following that with burnt sienna and umber in similar quantities. These soak into the plaster and give a realistic mottled effect. Leaving some of the plaster in its natural white will give some nice contrasts for the final wash.

Once dry, a thin wash of black is applied over all. Have plenty of paper towel ready to soak up the excess. The flatter areas were going to be flocked, so I painted them in basic burnt sienna to prevent any white plaster showing through.

I used foam flocks for the ground covers, spraying with diluted PVA glue as I went to build up layers of progressively lighter-coloured flock. I'd never worked with foam flocks prior to this, but I was delighted to find that once they're dry, they harden up a treat, providing a realistically textured surface without sacrificing durability. 

Most of the work was done down in the garage out of consideration for the cleanliness of our kitchen, so I didn't end up documenting the whole process step by step, but I can at least share pics of the finished product.


The slopes of the hill and flat areas are finished with assorted foam flocks, plus Tajima's wild grass tufts and Moorland diorama effects. More tufts were placed in recesses in the rock faces. Small rocks, twigs, and sand were scattered around and hit with liquid super glue to fix them immediately in place.


More offcuts from my mother-in-law's garden were pressed into service to make a dead tree, because this tower has been a ruin for a long time. This was painted with GW Dryad Bark and drybrushed with GW Gorthor Brown and a light dusting of Vallejo Game Colour Cold Grey. Geek Gaming Scenics Forest Floor flock was scattered around the tower's interior.


Add a few tufts growing out from between the stones, and a raven perched in the tree (courtesy of the Warhammer Giant kit, the best source of fantasy set dressing materials for my money) and voila, it's done!


So what lessons have I taken away from this? 

Firstly, Sculptamold doesn't take up the washes used in the leopard-spotting technique as readily as plain plaster, so use it sparingly when building rocky surfaces. It's best as a simple gap filler in this situation. I used a bit too much on this piece and had to go over the affected areas a couple of times to ensure coverage.

Be sure to mop up excess washes quickly - MDF REALLY doesn't like to get wet.

When spraying diluted PVA from a spray bottle, sooner or later you'll get blockages. A squeeze bottle with a fine nozzle can do just as well when wetting down flocked surfaces. It can be messy, but as I said above, keep plenty of paper towels on hand and you should be right.

Working with washes and successive sprays of PVA glue means a fair bit of waiting time between steps, and the completed piece can take a while to dry, so patience is a virtue.

I'm quite pleased with the results, and this little project has definitely given me some more ideas to go on with. Considerations of space probably mean that I won't be building any huge modular gaming tables in the near future, but if ever I get a shed, watch out!

What's next? Maybe some more Frostgrave, or maybe a detour to the Bronze Age?

Stay tuned...

Ev

Sunday, 28 June 2020

Old Dog Learns New (Terrain) Tricks - Part the First

It all started innocently enough.

Like so many of us in lockdown, my e-commerce activity has shown a bit of a spike lately. 150 or so MDF rounds from Warbases, some assorted Hellenistic figs from Warlord and Polemarch, and this thingy below;


It's a textured roller from Green Stuff World, and it has opened a veritable tin of terrain worms here at Chez Ev.

Of course, I had to test it out straight away, so it was off to the shops for a pound of Das air-drying clay. Grabbed a cardboard tube from the stash in the garage, rolled out a couple of sheets of the Das with the brickwork roller, stuck it to the tube with PVA glue, and left it to dry. This last step took longer than anticipated. Like a week longer.

But here's the result;


That worked well, thinks I, but what am I going to do with it? Why, make a piece of SAGA or fantasy skirmish terrain, of course! I drag out a Warbases terrain base and get to work with some extruded polystyrene foam and the hot glue gun. Oh, did I not mention the new glue gun...?

"This is the DeWalt Ceramic Glue Gun, the most powerful hot glue gun in the world..."
So yeah, things were escalating quickly...

Adding to the mayhem, I started looking for hints and tips on building realistic rocky terrain, and stumbled upon some YouTube channels which were to prove my downfall; Boulder Creek Railroad, The Terrain Tutor and Luke's APS. I admit it. I was hooked. What these guys can't do with foam, plaster and glue isn't worth doing.

Several days and a few dozen hours of viewing later, I'd grabbed some Woodland Scenics Rock Moulds, some Sculptamold Modelling Compound, and went a little bit crazy.


The rocks were cast in plaster of Paris and hot-glued on and around the edges of the foam, and blended into the piece with Sculptamold. Sculptamold is a mix of shredded tissue paper and plaster of Paris. It dries as hard as plaster, but weighs less and can be sculpted as it dries. In retrospect, I'd probably use less of it in future and leave more of the plaster rocks exposed. You'll see why later.

So where is this going? Somewhere potentially quite expensive and with a very steep learning curve!

Stay tuned...

Ev

Wednesday, 14 February 2018

AHPC VIII - Ev's Challenge, Day 57

Greetings friends and followers!

It's been a while since I've delivered a progress report on what has been a moderately productive Analogue Hobbies Painting Challenge (at least by my admittedly leisurely standards), so here goes.

I had a bit of a rest following the Flight Theme Round, but resolved to get back into the game while on holidays from work.

First off the table was my entry in the Theme Round, 'BFG', 'Shooting the Messenger', an insight into how Ogres handle battlefield parleys.


A concerted push to get some more terrain into the mix saw the long-neglected contents of my garage get turned over in quest of something suitable, and I lighted on an old kit from GW, 'Dreadstone Blight', a ruined wizard's tower.


I'm very pleased with how it turned out, though the designers do love them some skullz...

I was also able to return to a previous subject, Chaos Dwarf Admiral Thadrak Krakenbane, seen here at the height of his powers. This Scibor sculpt was a delight to paint.


A Reaper Bones Ettin rounded out Day 41's entries. I decided to go with a yellowy skin tone, and the large expanses of flesh on the beastie rewarded the extra effort.


The 'Music' Theme Round was upon me shortly afterwards, and I was pleased to be able to submit some old skool minis in the form of these Goff Rockerz, an Ork rock band from the early WH40K universe. Extra bright goblin green skin and gaudy costumes, and the tribute to the days of Rogue Trader was complete!

Finally, I finished some more Scibor Dwarves, the Salvage Crew. The colour scheme is meant to recall blue denim overalls and convey a sense of no-nonsense workers and craftsmen.


A wealth of detail on these sculpts, especially given their small size, but they really repay the extra effort.

Another bonus theme awaits, 'Childhood', so I'd better get cracking.

Stay tuned...

Ev

Thursday, 21 December 2017

More Boxer Rebellion Scatter Terrain

I've been working hard to clear a backlog of half-finished projects from the workbench over the last week to make room for AHPCVIII work to commence (which it has, more later in that regard).

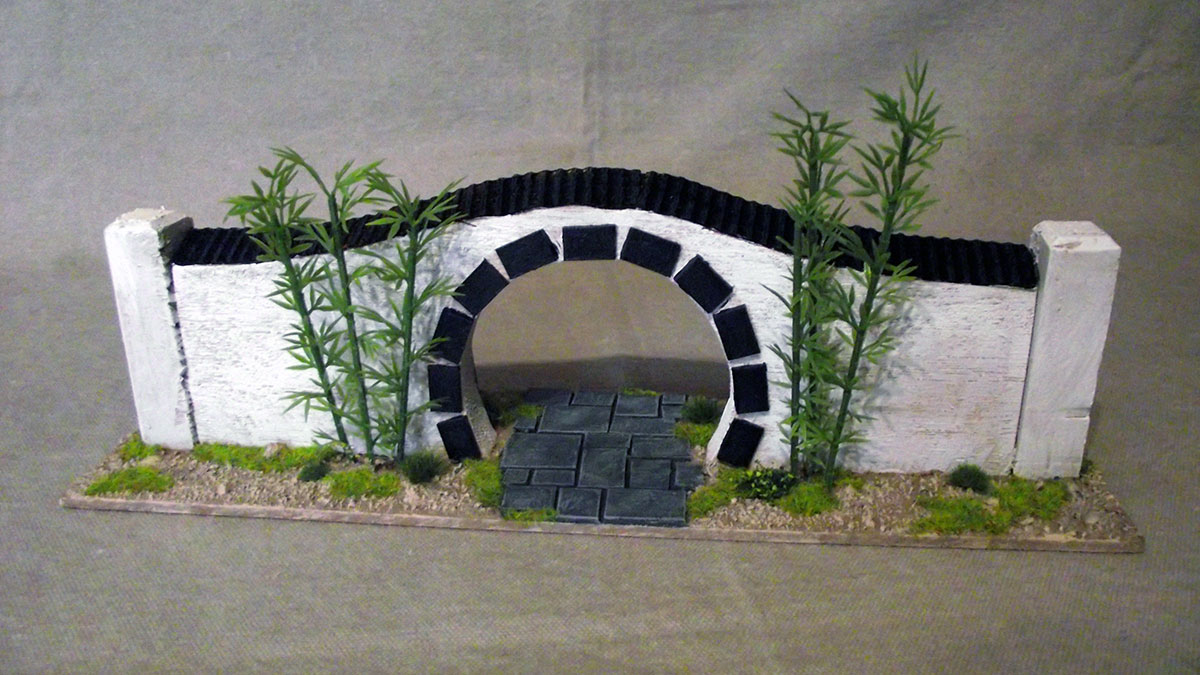
One of these projects was more scatter terrain for my 55 Days at Peking project. Today I finished basing up a moon gate made from left-over scraps from other projects, plus a batch of lanterns and statues from TT Combat.


The TT Combat stuff is really nice indeed. Crisply cast, very little flash and certainly no defects.
Easy-peasy to paint up using a combination of black undercoat and successive layers of grey dry-brushing plus a few highlights and details.

My 18 y.o. daughter Anna enjoys terrain work (or terraining and she likes to call it) so I handed these over to her and she did a sterling job indeed! Even better, we spent a really enjoyable 90 minutes together working and talking about nothing in particular.


I'm building up a decent sized collection of scatter terrain now to go along with the various buildings. The table is going to look sweet in a few weeks time when I get my first game proper on the go.


Next up a large batch on Imperial forces infantry which are Challenge fare, including German Seebatallion, Russian Sailors and Japanese Infantry.

Cheers,
Millsy

Sunday, 26 November 2017

New look, Boxer Terrain and a Another Long Walk

Whilst out walking this morning it occurred to me that it has been a fair while since the blog had a face lift. I decided to go with a more appropriate theme for what's been my 55 Days at Peking Project, hence the new header, wallpaper and palette. Hope you like it!

So what's actually in the works for the project then? Well another couple of (smaller) legations once some modelling supplies arrive for starters. In the mean time I'm working on a couple of canal bridges, a piece of scatter terrain in the form of another moon gate and finally some other small scatter terrain resin items from TT Combat. You can't have enough "local colour" after all.


The Imperials are now getting some love in the form of some German Seebatallion and Russian Sailors from EMP Games. Wonderful service and although they needed a little cleaning up they appear to be lovely sculpts.


I also have some Japanese sailors in the post from Jim Bibbly, once again a very positive shopping experience and hopefully the product arrives soon!

Speaking of walking, I reversed my path from my last walk and then turned left halfway to head up Bees Nest Hill (of which we cannot speak as this is a family-friendly blog) on my way to Grose Head South. The view from the top is magnificent, well worth the 15km or so total there and back.


If I'd continued along this ridge I'd reach the trig point on the very end with a cracking view of the Nepean river and country beyond, before finally heading down into Yarrmudi at the foot of the escarpment. I've been considering that one for a while and despite the [deleted] hill in between I reckon that'll happen sooner rather than later.


And before I sign off, I've uploaded my first entry of the Old World Army Challenge, which will appear here in due course once it has had its day in the sun on the challenge blog.

Cheers,
Millsy

Sunday, 15 October 2017

Peking - Russian Legation Build Complete!

So that's another legation compound build complete with the painting and basing of the Russian Legation finished up today. You can see part one of the build here...

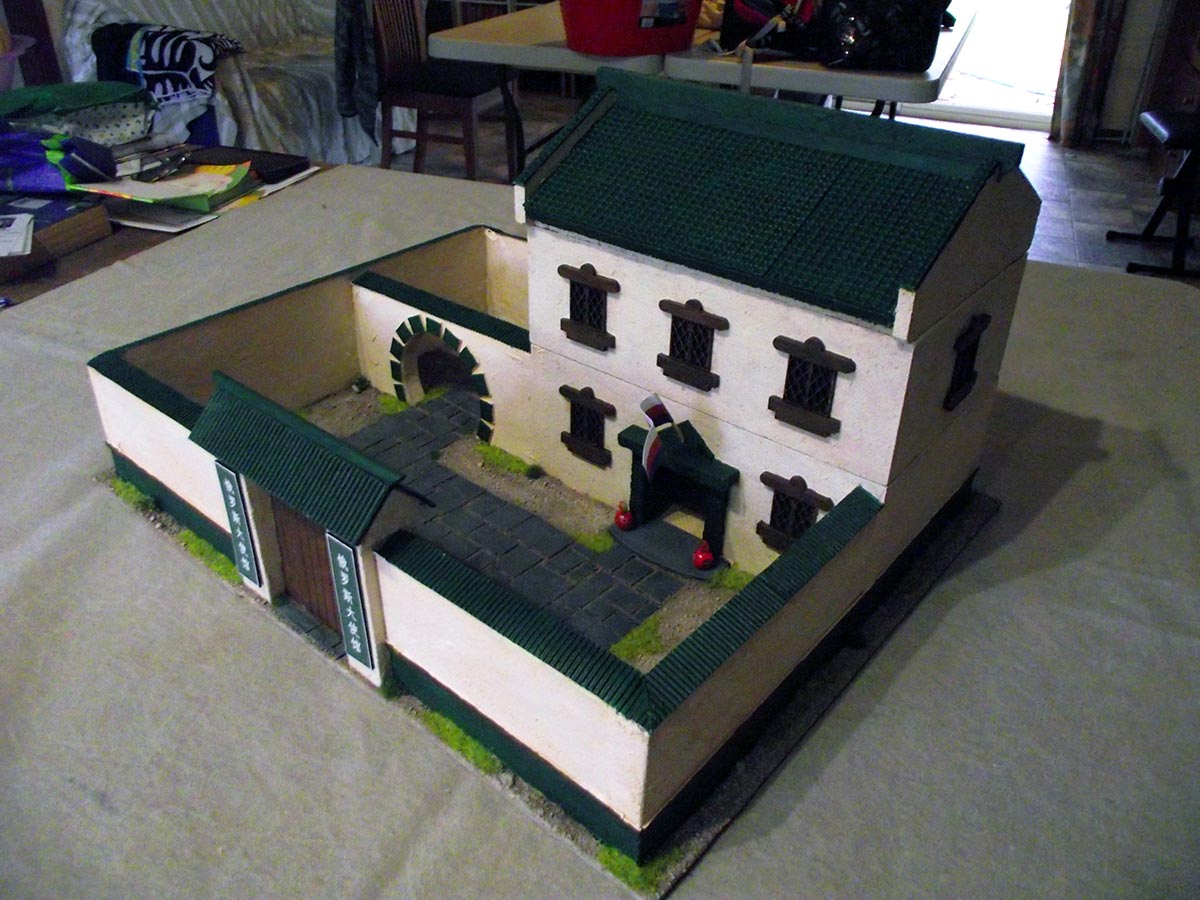
I went ahead and added a bunch more details on this build right from the start as I mentioned last post. I'm glad I did and I'm really pleased with the overall finished building.


Google Translate provided the text for "Russian Embassy" in a suitable font.


A Russian period style flag flies over the door which is flanked by some flower pots with blooms.


The moon gate gives entry to the courtyard which will alternately have trees and flowers or firing steps included. Paving leads from the front gate to both the main building and the courtyard.


Like the British Legation the first floor is removable.


Next up? A couple of bridges and the canal I think. Once that's done it might be time for some progress shots of all the existing terrain set out together.

Cheers,
Millsy

Sunday, 8 October 2017

Peking - The Russian Legation

Plowing on with the build of the legations for my 55 Days at Peking project, I have now finished (more or less) the build of the Russian Legation. Somewhat smaller than the British Legation, the overall footprint is something like 15" x 12".

I felt I didn't put enough effort into the British Legation from an overall detail point of view. That was party because I can fill the interior with scatter terrain, but partly I just wasn't sure how much to add. I'll go back and correct that later on but in the case of the build I went ahead and added more detail right off the bat including a moon gate and different roof profile. As before the first floor is optional.

Anyway, enough words, time to let the pictures do the talking...


The painting will commence shortly. I'm going with a green roof and ornamentation to reflect the Russian ownership. I'll also do the walls in two colours, a dark colour up to the divider and the whitewash above. Stay tuned!

Cheers,
Millsy

Thursday, 28 September 2017

Cheap and Cheerful Chinese Market Stalls

Time for one more quick terrain post before this weekend's Boxer game.

The Mongol Market wouldn't be much of a market without some stalls so these were knocked up from off cuts of timber and cork from various other terrain projects to date. They still need some goods but the hard part is done...


I've just finished another dozen Boxers too so they'll also be appearing here sooner rather than later.

Cheers,
Millsy

Sunday, 24 September 2017

Peking - British Legation Complete!

I'm happy to report that bar a few minor items (e.g. a flag) the British Legation is complete. Overall pretty happy with how things have turned out. The photos don't show the contrast as well as they might so you'll have to imagine that the window frames are clearly distinct from the darker interior.


As per several requests, some 28mm Perry Miniatures British Naval Brigade stoutly defending the gatehouse to give a sense of scale...


I'm still debating the front door. I left it out til now thinking I could make an undamaged and a damaged version for a last ditch defence but that just seems like a lot of effort. If the Boxers and inside the walls it's pretty much game over man anyway (go on click away, you KNOW you want to).


The first floor can be removed for a smaller walled configuration if I decide to do some battles outside Peking. The roof also comes off both the main building and the hospital for storage and so figures can hide inside.


The hospital...


At some point I think I'll add some window shutters in the same red as the roof folded back against the wall for a bit more interest. As it is stands it looks a bit flat. Having said that, some trees and a statue or two in the courtyard will go a long way to alleviate that.


I've also finished up four small stalls for the Mongol Market which I'll put up later in the week.

Thanks for all the positive comments on the build to date. It's taken considerable effort and the feedback has been a great motivator.

Cheers,
Millsy
Related Posts Plugin for WordPress, Blogger...